5-Step Easy Pumpkin Pie Cups Recipe: Bite-Sized Fall Dessert
Introduction
Discover how to make delicious Easy Pumpkin Pie Cups—bite-sized treats perfect for fall gatherings! This simple recipe delivers all the classic flavors of pumpkin pie in a convenient, portable form. Learn step-by-step instructions, variations, and tips for a perfect dessert every time.
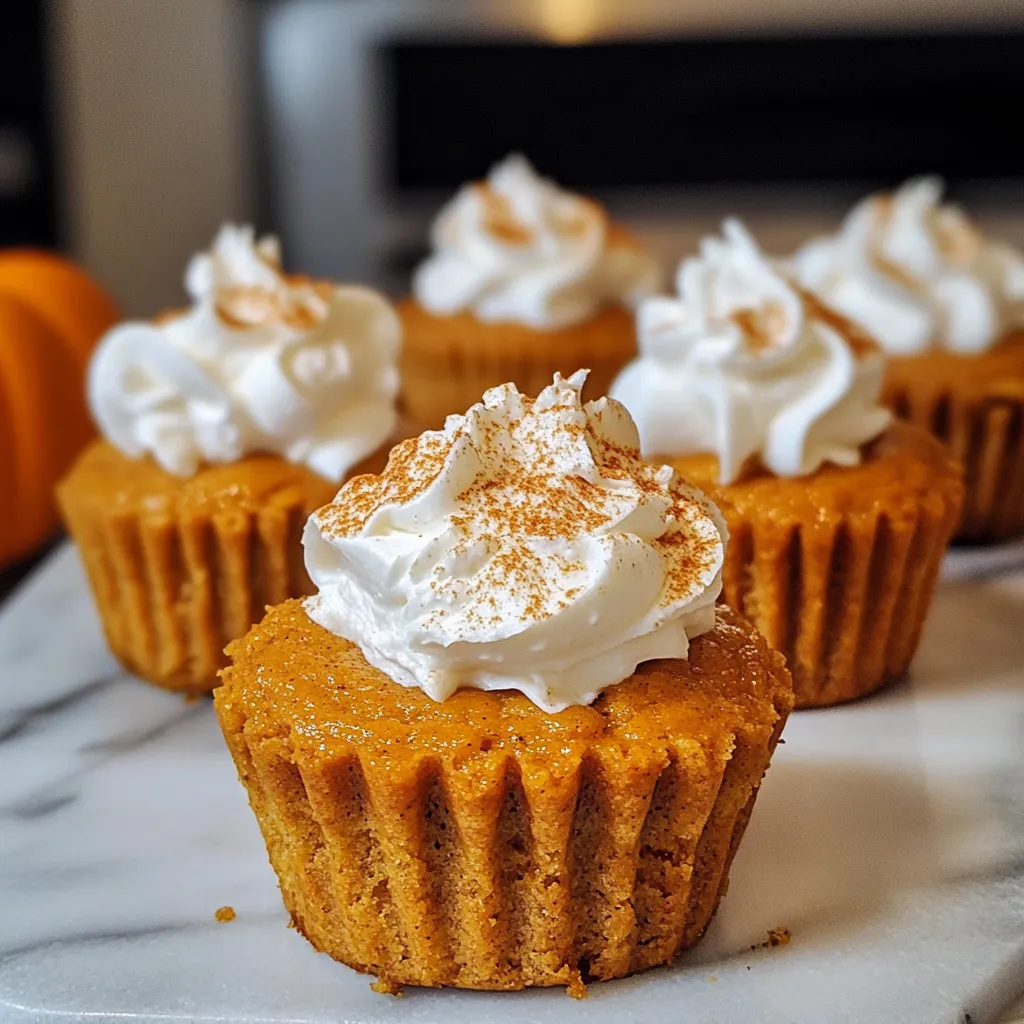
Imagine the warm, comforting flavors of pumpkin pie in a perfectly portioned cup! Pumpkin pie cups are the ultimate solution for those who want the taste of classic pumpkin pie without the fuss of slicing and serving. These little treats are great for parties, family gatherings, or even just a cozy autumn snack. They’re easy to make, delicious, and look adorable on any dessert table.
So why not swap out the traditional pie for these mini wonders? They offer all the creamy, spiced goodness of a full-size pie in a convenient handheld form. Let’s dive into this simple, yet satisfying recipe that’ll become your go-to fall dessert!
Ingredients Overview
To whip up these tasty pumpkin pie cups, you’ll need a handful of basic ingredients that are easy to find at any grocery store.
For the Crust:
- 1 package of pre-made pie crust or 2 sheets of puff pastry
- Cooking spray or butter for greasing the tin
For the Filling:
- 1 cup canned pumpkin puree
- 1/2 cup sweetened condensed milk
- 1/4 cup brown sugar
- 1 teaspoon pumpkin pie spice (or mix of cinnamon, nutmeg, and cloves)
- 1 large egg
- 1 teaspoon vanilla extract
Optional Toppings:
- Whipped cream
- Chopped pecans or walnuts
- A sprinkle of cinnamon
Tips on Ingredients:
- Pumpkin puree: Ensure you’re using pure pumpkin puree, not pumpkin pie filling.
- Spices: Customize the spice blend to your taste by adding extra cinnamon or a hint of ginger.
- Sweetened condensed milk: This ingredient adds richness and sweetness, but you can swap it with heavy cream and sugar if preferred.
Kitchen Tools You’ll Need
You don’t need any fancy equipment to make these easy pumpkin pie cups, but having a few essentials on hand will make the process smoother:
- Muffin tin or mini muffin pan
- Mixing bowls (small and medium)
- Whisk or hand mixer
- Measuring cups and spoons
- Rolling pin (if using homemade crust)
- Spatula
For extra convenience, you might want to have:
- Parchment paper or cupcake liners for easy cleanup
- Cookie cutter for cutting the crust into perfect circles
Step-by-Step Instructions
Preparing the Ingredients
- Preheat the Oven: Set your oven to 350°F (175°C) to get it nice and warm for the baking process.
- Mix the Pumpkin Filling: In a medium bowl, whisk together the pumpkin puree, sweetened condensed milk, brown sugar, pumpkin pie spice, egg, and vanilla extract until smooth. Make sure there are no lumps.
- Prepare the Crust: If using pre-made pie crust, roll it out slightly on a floured surface. Use a round cookie cutter or the rim of a glass to cut out circles big enough to fit into the muffin tin.
Assembling the Pumpkin Pie Cups
- Grease the Muffin Tin: Lightly spray the tin with cooking spray or brush with melted butter.
- Line the Muffin Cups: Gently press the crust circles into each muffin cup, ensuring they form a little cup shape.
- Add the Filling: Spoon the pumpkin mixture into each cup, filling them about ¾ full to avoid overflow.
Baking the Pumpkin Pie Cups
- Bake for 20-25 Minutes: Place the muffin tin in the oven and bake until the filling is set and slightly puffed, and the crust is golden brown.
- Cool Completely: Allow the pumpkin pie cups to cool in the tin for 10 minutes, then transfer them to a wire rack to cool completely before serving.
Variations on Pumpkin Pie Cups
One of the best things about these pumpkin pie cups is their versatility. Whether you’re catering to dietary restrictions or simply looking to jazz up the classic flavor, there are endless ways to customize this recipe.
Gluten-Free Pumpkin Pie Cups
For those avoiding gluten, you can make a crustless version or use gluten-free alternatives. Here’s how:
- Crustless Version: Simply skip the crust altogether and pour the pumpkin filling directly into greased muffin tins. These will bake into little custard-like cups that are smooth and creamy.
- Gluten-Free Crust: Use gluten-free pie crusts available at many grocery stores, or make your own using almond flour or a mix of gluten-free flours for a buttery, crumbly crust.
Toppings and Add-Ins
Elevate your pumpkin pie cups with fun toppings or mix-ins:
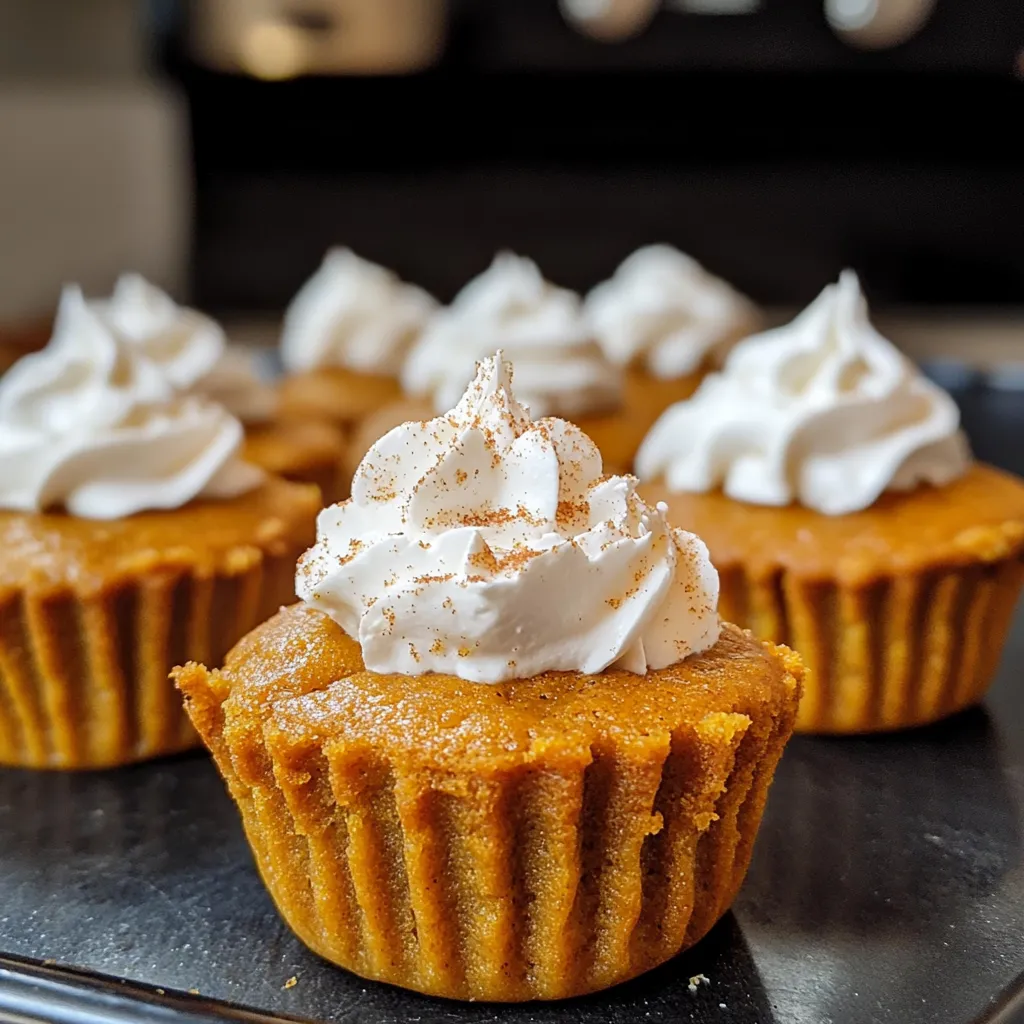
- Whipped Cream Swirls: Add a dollop of homemade whipped cream or use store-bought for convenience. Sprinkle with cinnamon for a decorative touch.
- Candied Pecans or Walnuts: These add a crunchy contrast to the smooth filling. Simply chop and sprinkle on top before serving.
- Chocolate Chips: Fold mini chocolate chips into the pumpkin filling for a sweet surprise in every bite.
- Maple Drizzle: Drizzle pure maple syrup over the cups after baking for a rich, autumn-inspired finish.
Tips for the Perfect Pumpkin Pie Cups
To ensure your pumpkin pie cups turn out perfectly every time, follow these helpful tips:
Crust Tips
- Avoid Overworking the Dough: If you’re rolling out the pie crust yourself, be gentle. Overhandling can make the crust tough rather than flaky.
- Chill the Dough: If the dough becomes too warm, chill it in the refrigerator for 10–15 minutes before pressing it into the muffin tin. This helps prevent shrinkage during baking.
Filling Tips
- Do Not Overfill: Filling the cups more than ¾ full can cause overflow during baking, leading to messy, uneven pies.
- Use Room Temperature Ingredients: Allow the egg and sweetened condensed milk to come to room temperature before mixing. This ensures a smooth, creamy filling.
Baking Tips
- Check for Doneness: The filling should be slightly puffed and set but still jiggle slightly in the center when you gently shake the pan.
- Cool Slowly: Let the cups cool in the tin for a few minutes before transferring them to a rack. This prevents cracking in the filling.
Storing and Reheating Pumpkin Pie Cups
Proper storage will help you enjoy these treats for days. Here’s how to keep them fresh:
Refrigerating Pumpkin Pie Cups
- Store the cooled pumpkin pie cups in an airtight container in the refrigerator. They’ll stay fresh for up to 4 days.
- Place parchment paper between layers to prevent them from sticking together.
Freezing Pumpkin Pie Cups
- To freeze, place the cooled cups on a baking sheet and freeze until solid. Then, transfer them to a freezer-safe bag or container. They’ll keep for up to 3 months.
- Thaw in the refrigerator overnight before serving.
Reheating Instructions
- Microwave: Reheat individual cups for 15–20 seconds on high for a quick warm-up.
- Oven: For a crisp crust, warm them in a 350°F (175°C) oven for 5–10 minutes.
Serving Suggestions
Pumpkin pie cups are delightful on their own, but here are a few ideas to make them extra special:
- Dessert Platter: Arrange them on a dessert tray alongside other mini treats like brownies or cookies for an eye-catching display.
- Seasonal Garnishes: Decorate with edible flowers, cranberries, or a dusting of powdered sugar for a festive look.
- Perfect Pairings: Serve with a hot cup of spiced cider, pumpkin spice latte, or a scoop of vanilla ice cream for the ultimate autumn experience.
Nutrition Facts
Estimated per serving (1 cup):
- Calories: 150–180
- Fat: 8g
- Carbohydrates: 20g
- Protein: 3g
- Fiber: 1g
Health Benefits:
- Pumpkin: Rich in beta-carotene, vitamin A, and fiber, pumpkin is a nutritious and delicious addition to your diet.
- Spices: Cinnamon and nutmeg not only enhance flavor but also offer antioxidant properties.
Why You’ll Love These Pumpkin Pie Cups
There’s so much to love about these pumpkin pie cups! They’re:
- Easy to Make: Simple steps with minimal prep time.
- Portable: Perfect for on-the-go snacking or parties.
- Customizable: Endless ways to personalize with crusts, fillings, and toppings.
- Kid-Friendly: A fun treat that little hands can help make.
Whether you’re hosting a holiday gathering or just want a quick fall dessert, these pumpkin pie cups are sure to impress.
FAQs About Pumpkin Pie Cups
1. How long do pumpkin pie cups last?
They can be stored in the refrigerator for up to 4 days and in the freezer for up to 3 months.
2. Can I freeze pumpkin pie cups?
Yes! Freeze them in a single layer until solid, then transfer to a freezer-safe container. Thaw in the fridge before serving.
3. Do I need to blind-bake the crust?
No, blind-baking isn’t necessary for this recipe since the crust bakes evenly with the filling.
4. What can I use instead of canned pumpkin?
Fresh pumpkin puree can be used by roasting and blending pumpkin flesh until smooth.
5. How do I make them dairy-free?
Substitute coconut milk or almond milk for the sweetened condensed milk and use a vegan pie crust.

