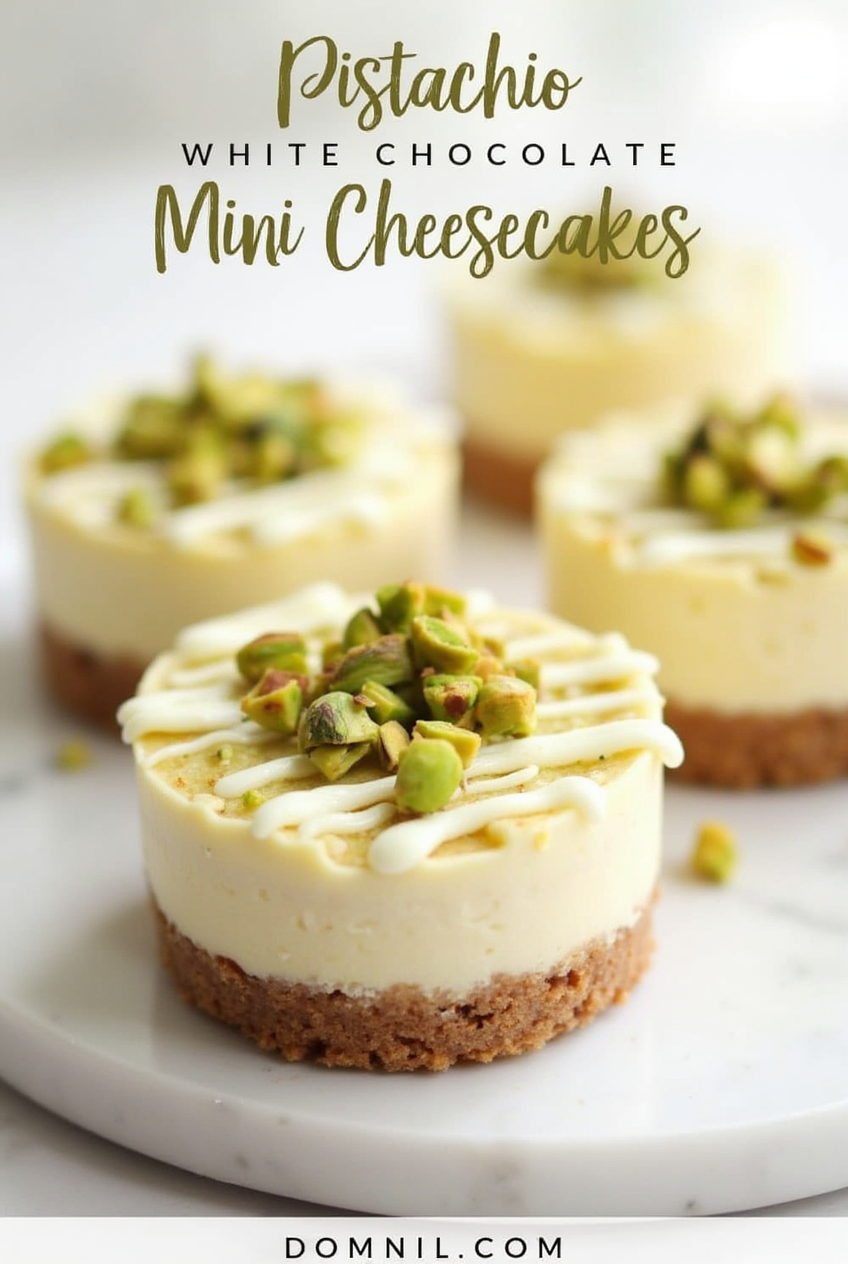
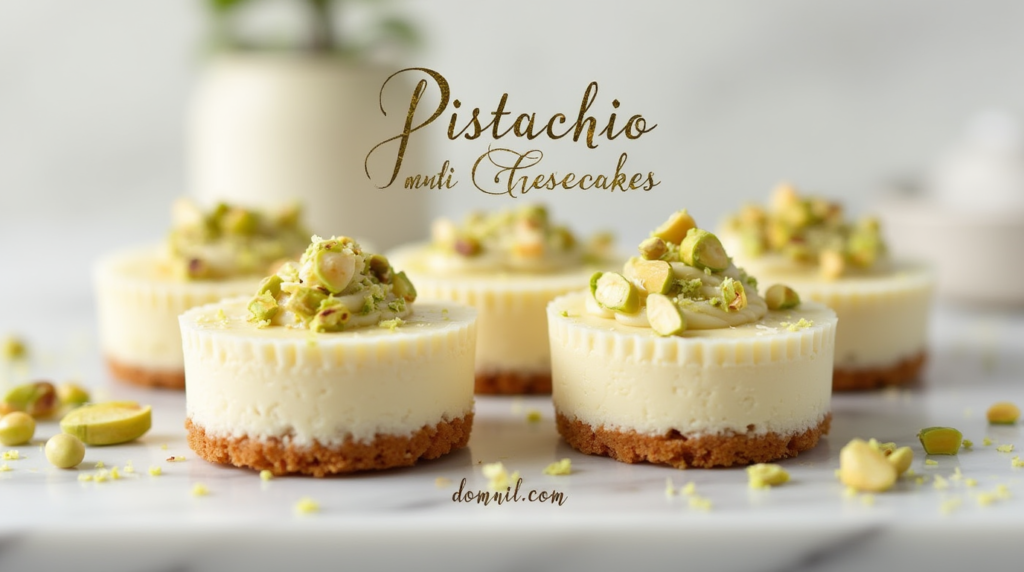
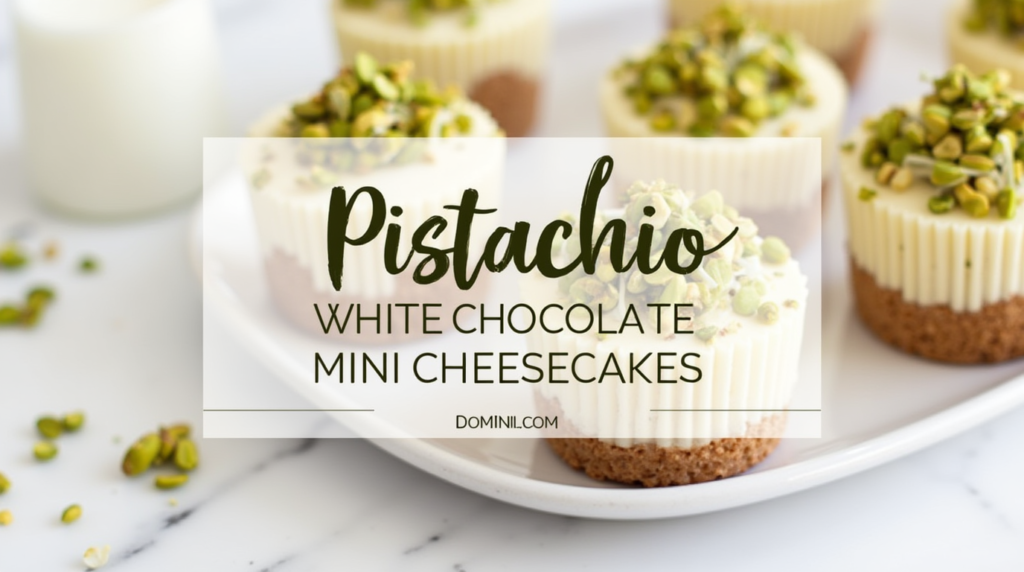
The irresistible Pistachio White Chocolate Mini Cheesecakes
Mini cheesecakes are a dream come true for dessert lovers, especially when they combine the rich, creamy texture of classic cheesecake with the nutty crunch of pistachios and the sweet melt of white chocolate. These bite-sized delights aren’t just pretty to look at—they’re packed with flavor that leaves a lasting impression. Whether you’re planning a dinner party, a holiday celebration, or just want a treat all to yourself (we won’t judge), these Pistachio White Chocolate Mini Cheesecakes are the perfect solution. They’re sophisticated enough for special occasions and easy enough to whip up on a weekend afternoon.
Introduction to Pistachio White Chocolate Mini Cheesecakes
The irresistible combo of pistachios and white chocolate
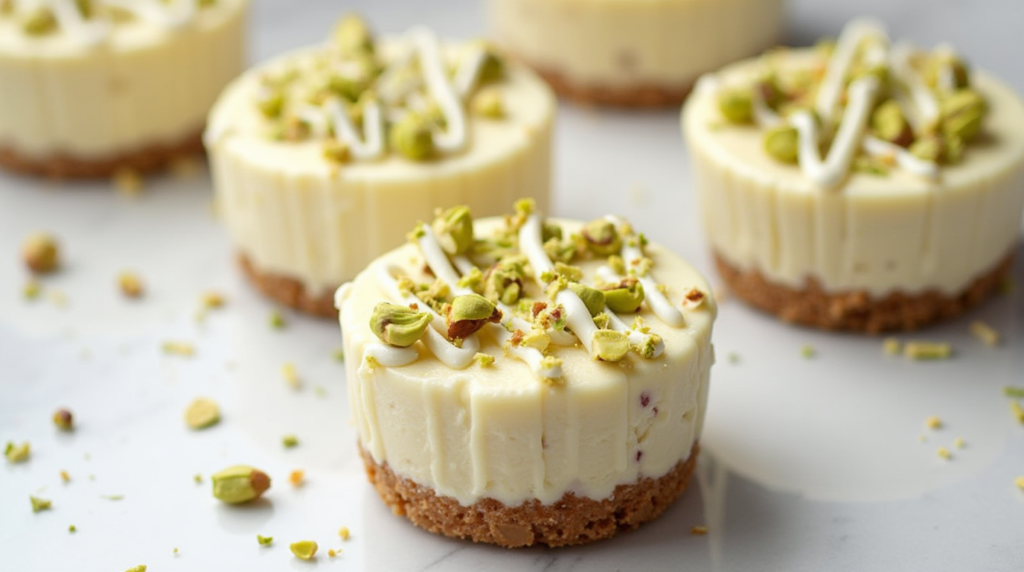
Pistachios and white chocolate might sound fancy, but together they create a surprisingly harmonious flavor. The mild saltiness and buttery crunch of pistachios contrast beautifully with the sweet, creamy notes of white chocolate. When combined in a cheesecake, this duo offers a luxurious flavor profile that’s both rich and refreshing. It’s a step above your standard cheesecake without being overly complicated.
Pistachios also bring a beautiful green hue and texture, making your mini cheesecakes visually appealing. Add in the silkiness of white chocolate and you’ve got a dessert that looks and tastes like it came straight from a high-end bakery.
Why mini cheesecakes are perfect for any occasion
Full-size cheesecakes are great, but mini cheesecakes have their own charm. They’re individual servings, which makes them perfect for parties, buffets, or even picnics. No slicing, no mess—just grab and go. They also bake more evenly and quickly than larger cheesecakes, which means less chance of cracking and more consistent texture.
Plus, mini cheesecakes give you more control over presentation. Topped with crushed pistachios, a drizzle of melted white chocolate, or even a dollop of whipped cream, each one can look like a tiny masterpiece. And let’s face it—there’s something inherently fun and satisfying about mini desserts.
Ingredients That Make It Irresistible
Key ingredients you’ll need
Let’s break down what goes into these delicious cheesecakes. Here’s a quick rundown of the essentials:
Graham cracker crumbs or digestive biscuits for the crust
Butter, melted, to bind the crust
Cream cheese, room temperature, for the filling
Sugar, preferably granulated
Eggs, to help the filling set
Vanilla extract, for a warm, aromatic flavor
White chocolate, melted and cooled
Pistachios, finely chopped or ground
Heavy cream or sour cream, to enhance the creamy texture
Using fresh and high-quality ingredients can make a big difference. Choose good-quality white chocolate bars over chips, and opt for raw pistachios that you can toast yourself to bring out their nutty depth.
Choosing quality pistachios and white chocolate
Pistachios should be vibrant green with no signs of discoloration or staleness. Roasting them lightly enhances their flavor, but avoid overly salted varieties—they can throw off the balance of your dessert. If you can get your hands on Sicilian pistachios (the best in the world), you’re in for a real treat.
When it comes to white chocolate, steer clear of overly processed brands. Real white chocolate contains cocoa butter, not just palm oils or fillers. Look at the ingredients—cocoa butter should be one of the first listed. Melting white chocolate gently is also key; a double boiler works great to keep it from burning or seizing.
Tools and Equipment You’ll Need
Baking essentials
You don’t need a commercial kitchen setup to make these mini cheesecakes, but a few essentials make the process much smoother:
12-cup muffin pan or mini cheesecake pan
Cupcake liners, if using a muffin tin
Mixing bowls
Hand or stand mixer
Spatula for folding and mixing
Measuring cups and spoons
Food processor or blender (for crushing graham crackers and pistachios)
A springform mini cheesecake pan will help you remove the cheesecakes cleanly and makes for neater presentation. But if you don’t have one, muffin tins with liners work just as well.
Optional tools for easier preparation
Some optional but helpful tools include:
Piping bag for neater filling distribution
Double boiler or microwave for melting chocolate
Cooling rack to help them chill evenly
Offset spatula to smooth the tops
Having the right tools doesn’t just make baking easier—it makes it more enjoyable. No one wants to struggle with stuck cheesecakes or uneven crusts, so it’s worth investing in a few good-quality basics.
Step-by-Step Recipe Guide
Preparing the crust
Let’s start with the base. This is what gives your cheesecake structure and crunch.
Preheat your oven to 325°F (160°C).
Combine 1 ½ cups of graham cracker crumbs, 2 tablespoons sugar, and 6 tablespoons of melted butter.
Press the mixture into the bottoms of your muffin liners or mini cheesecake molds. Use the back of a spoon to get a firm, even layer.
Bake for about 5-7 minutes, then let cool while you prep the filling.
The crust should be slightly golden and firm to the touch. You want it set enough to support the creamy filling but not so baked it becomes brittle.
Making the Creamy Cheesecake Filling
The filling is where the magic happens. This is the heart of your mini cheesecakes—rich, creamy, and full of flavor.
In a large bowl, beat 16 oz (450g) of cream cheese until smooth and fluffy. It’s crucial that your cream cheese is at room temperature to avoid lumps.
Add ½ cup of granulated sugar and beat again until well incorporated.
Mix in 2 large eggs, one at a time, beating well after each addition.
Stir in 1 teaspoon of vanilla extract and ¼ cup of sour cream or heavy cream. These ingredients make the texture extra smooth and creamy.
Gently fold in 4 oz of melted white chocolate that has been cooled slightly.
Finally, add ½ cup of finely chopped pistachios into the batter.
Don’t overmix at this stage. Overbeating can introduce too much air into the batter, which can cause cracks or a sunken center during baking. Mix just until everything is blended and smooth.
Spoon the filling over your prepared crusts, filling each cup nearly to the top. You can use a spoon or a piping bag for neater distribution.
Baking and Chilling the Mini Cheesecakes
Mini cheesecakes bake faster than full-sized ones, which is great when you want dessert ASAP. Here’s how to do it right:
Bake at 325°F (160°C) for about 18-22 minutes, or until the centers are slightly jiggly but the edges are set.
Don’t open the oven door frequently; sudden temperature changes can cause cracking.
Once done, turn off the oven, crack the door slightly, and let them cool inside for 10 minutes to prevent sinking.
Remove from the oven and let them cool to room temperature.
Refrigerate for at least 3-4 hours, but overnight is best for full flavor and perfect texture.
Chilling not only firms up the cheesecakes but also helps the flavors meld beautifully. They’ll be dense, creamy, and absolutely dreamy by the next day.
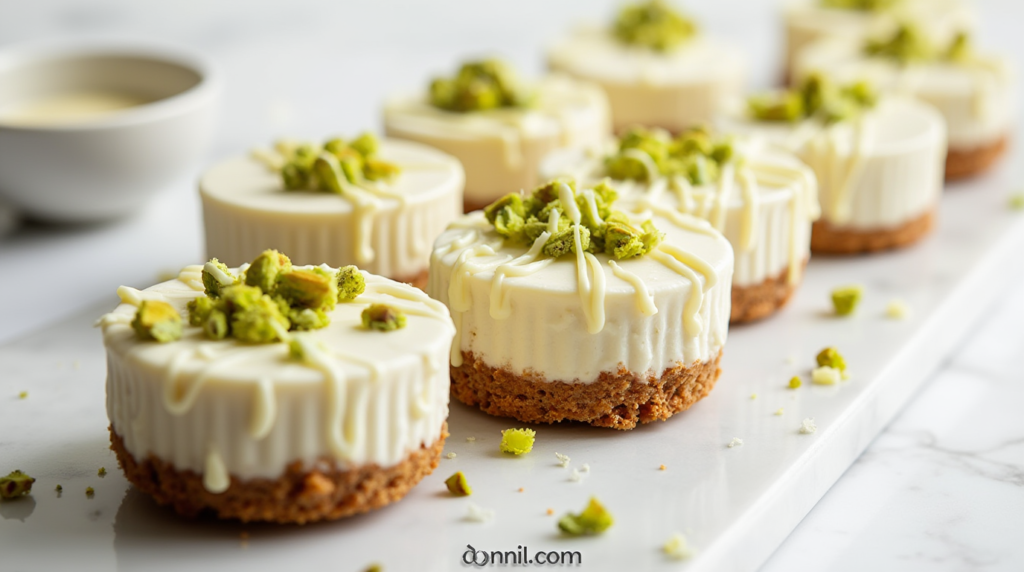
Pistachio and White Chocolate Garnish Tips
Presentation is everything when it comes to mini desserts. A well-garnished mini cheesecake can go from simple to stunning in seconds.
Here are some delicious garnish ideas:
White chocolate drizzle: Melt a bit more white chocolate and drizzle over the chilled cheesecakes using a spoon or piping bag.
Chopped pistachios: Sprinkle extra finely chopped pistachios on top for color and crunch.
Whipped cream: Pipe a small swirl on top and top with a single pistachio for elegance.
Edible gold flakes: For that luxe touch, especially if you’re serving these at a special event.
Fresh mint leaves: Add a pop of green and freshness.
Keep garnishing just before serving to retain crisp textures and fresh appearances. Store-bought toppings work too if you’re in a rush, but nothing beats fresh garnishes made at home.
Serving and Storing Your Mini Cheesecakes
Best ways to serve and decorate
These little cheesecakes are versatile. Serve them chilled, straight from the fridge. They’re firm enough to hold their shape but creamy enough to melt in your mouth.
For special occasions, arrange them on a dessert platter and alternate garnishes for a visually striking presentation. Consider pairing with a glass of dessert wine or coffee to round out the experience.
You can also turn them into a DIY dessert bar. Set out toppings like caramel sauce, chocolate chips, crushed nuts, and let guests decorate their own. It’s interactive, fun, and delicious.
Storing for freshness and longevity
Mini cheesecakes should be stored in an airtight container in the refrigerator. They’ll stay fresh for up to 5 days. If you’re making them in advance for a party, prep the cheesecakes and store the garnishes separately until ready to serve.
Want to freeze them? Totally possible. Wrap each cheesecake individually in plastic wrap, then store in a freezer-safe container. They’ll keep well for up to 2 months. Thaw in the fridge overnight before serving.
Avoid leaving them out at room temperature for extended periods—especially if garnished with whipped cream or fresh toppings—as they can spoil quickly.
Flavor Variations and Creative Twists
Mixing up the crust
The graham cracker crust is a classic, but don’t be afraid to get creative! You can try these delicious crust alternatives:
Oreo crust: Crush chocolate sandwich cookies for a deeper, chocolatey base that pairs beautifully with the white chocolate.
Pistachio shortbread: Use crushed pistachio-flavored cookies or shortbread for a buttery, nutty flavor throughout.
Digestive biscuits or gingersnaps: These bring a warm, spiced twist that complements the richness of the cheesecake.
Add a pinch of cinnamon or nutmeg to the crust mixture for extra warmth, or toss in some shredded coconut for a tropical note.
Adding complementary flavors
Want to push the flavor boundaries? Here are some unique add-ins that work beautifully with pistachio and white chocolate:
Citrus zest: A bit of orange or lemon zest brightens up the richness and adds a refreshing tang.
Rose water or orange blossom water: A few drops give the cheesecakes a Middle Eastern flair that pairs naturally with pistachios.
Raspberry or cherry swirl: Add a spoonful of fruit puree before baking and gently swirl for a tart contrast.
You could even mix mini chocolate chips into the batter or top with caramel for something a bit more indulgent.
Making It Gluten-Free or Vegan
Easy gluten-free swaps
Want to keep things gluten-free? It’s simple. Replace the graham crackers with:
Gluten-free graham crackers
Almond flour and a bit of honey
Gluten-free digestive biscuits
Ensure that all other ingredients, especially your white chocolate and flavorings, are also certified gluten-free to avoid cross-contamination.
Vegan-friendly version
It’s a little trickier to make a vegan version, but not impossible! Here’s how to do it:
Use vegan cream cheese: Brands like Tofutti or Kite Hill work well.
Replace the eggs with flax eggs (1 tbsp ground flax + 3 tbsp water = 1 egg).
Choose dairy-free white chocolate made from cocoa butter and non-dairy milk.
Use coconut cream or a vegan sour cream substitute to maintain richness.
The result may be slightly softer than the original version, but still delicious and creamy with that nutty-sweet charm.
Perfect for Holidays and Celebrations
Holiday favorite
These mini cheesecakes are showstoppers at any festive gathering. Their beautiful green hue from pistachios and elegant white chocolate topping make them especially perfect for:
Christmas: Add red berries or pomegranate seeds for a seasonal color palette.
Easter: Light, refreshing, and pastel-pretty—ideal for spring tables.
Weddings or bridal showers: Dainty and classy, they look gorgeous on dessert platters.
Make them a day in advance, garnish just before serving, and you’ve got a no-stress dessert that feels high-effort.
Great for gifting
Mini cheesecakes also make incredible homemade gifts. Package them in mini boxes or mason jars with a little ribbon. You can even add a handwritten tag with flavor notes or a cute message.
If you’re selling baked goods or running a home bakery, these are also excellent for portion control and visual appeal. People love individually wrapped desserts—they feel more personal and hygienic too.
Health Benefits of Pistachios (Yes, Really!)
Nutrient-rich and heart-healthy
You might not expect a dessert to come with health benefits, but thanks to pistachios, you’re getting more than just indulgence. These green gems are:
Packed with antioxidants: Like lutein and zeaxanthin, which support eye health.
Rich in healthy fats: Especially monounsaturated and polyunsaturated fats.
High in protein and fiber: Which helps keep you full longer.
They also contain key vitamins and minerals like vitamin B6, potassium, and magnesium. So, while this is definitely still a dessert, at least it’s one with a bit of a nutritional edge!
Common Mistakes to Avoid When Making Mini Cheesecakes
Overbaking or underbaking
One of the most common mistakes? Overbaking. Unlike regular cakes, cheesecake continues to cook as it cools. If the centers look completely set in the oven, they’re probably overdone. Aim for a gentle jiggle in the center—think “firm Jell-O” vibes.
Underbaking is equally problematic. It can leave the centers runny or too soft to hold their shape. Always follow the time and visual cues carefully, and remember: baking times may vary slightly depending on your oven.
Using cold ingredients
Using cream cheese or eggs straight from the fridge can make your batter lumpy and uneven. Always let your ingredients come to room temperature before mixing. It makes a huge difference in achieving that silky-smooth texture.
Skipping the chill time
Chilling isn’t optional—it’s essential. Mini cheesecakes need at least 3–4 hours to set properly. Otherwise, they’ll be too soft and may fall apart when unwrapped or served. If you can, chill overnight for the best results.
Why You’ll Fall in Love with This Recipe
This recipe isn’t just about flavor—it’s about experience. From the creamy center to the crunchy crust and nutty finish, every bite of these pistachio white chocolate mini cheesecakes is a delight.
They’re simple to make, yet feel sophisticated. Ideal for everything from birthday parties to bridal showers—or just a quiet night when you want something sweet and special. And thanks to their size, portion control is easy—though resisting a second helping might not be.
With every batch, you’ll discover new ways to tweak and personalize them. Add fruit, spices, or fancy toppings. Make them gluten-free or vegan. Use seasonal themes. These cheesecakes are your blank canvas.
Conclusion
Pistachio White Chocolate Mini Cheesecakes are more than just a dessert—they’re an experience. They bring together the nutty elegance of pistachios, the creamy sweetness of white chocolate, and the indulgent comfort of cheesecake in one perfect bite. Whether you’re baking for a celebration or just treating yourself, this recipe delivers elegance, flavor, and just the right touch of luxury.
They’re easy to prep, perfect for customizing, and loved by adults and kids alike. Plus, they look amazing on a dessert table. So why not make a batch this weekend? You might just find your new favorite dessert.
FAQs
1. Can I make these cheesecakes without a crust?
Yes! Just pour the filling directly into lined or greased muffin tins. They’ll be lighter and more mousse-like, but still delicious.
2. What’s the best way to melt white chocolate?
Use a double boiler or microwave in 15-second bursts, stirring in between. Don’t overheat—it seizes easily.
3. Can I use flavored white chocolate like raspberry or caramel?
Absolutely! Flavored white chocolate can add a new dimension. Just reduce additional sugar if the chocolate is very sweet.
4. Are these freezer-friendly?
Yes, freeze them after they’re fully set and cooled. Wrap individually in plastic and store in a freezer-safe container.
5. Can I make these ahead for an event?
Yes. Make them up to 2 days in advance, store in the fridge, and garnish just before serving for best presentation.